Design Resources
We are extremely excited to bring your unique talents to life with a truly one-of-a-kind product. Here are a few things that will typically provide for the best outcome for your pins, stickers, keychains, etc.
Design Resources
We are extremely excited to bring your unique talents to life with a truly one-of-a-kind product. Here are a few things that will typically provide for the best outcome for your pins, stickers, keychains, etc.
Types of products
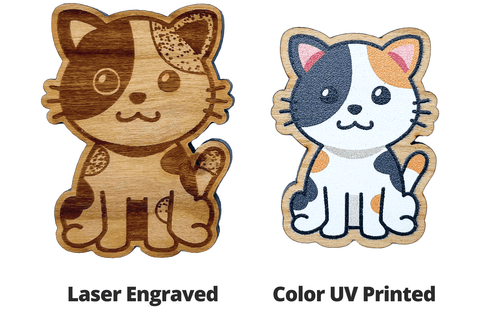
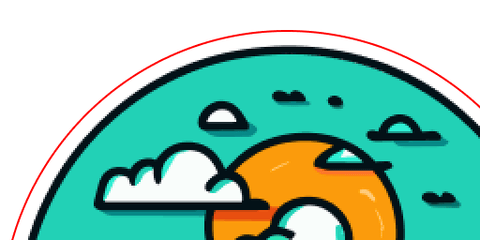
We offer two types of products - Laser Engraved and Color UV Printed. Below is an example of how artwork can translate into each style. Laser engraved offers a really natural and earthy feel while color uv printed is best suited for designs where the color needs to shine or cant easily convert to only black and white.
File Type
While we can work with a multitude of design files, an EPS file typically works best. Creating your vector artwork in Adobe Illustrator or Corel Draw will allow for the easiest export of an EPS file. We can also work with PNG, JPGs, PDFs, and in some cases a finalized drawing. When working with these files we suggest working at the highest resolution possible, 300 DPI or more. If you have any questions or concerns about your artwork, you can always reach out. We will help guide you on what modification may need to be made for your artwork to be used.
Tips for setting up your artwork for engraving
Great artwork plays a huge part in how well your wood pins, stickers or keychains engrave. Follow the tips below before submission. If you have any questions, just ask! :)
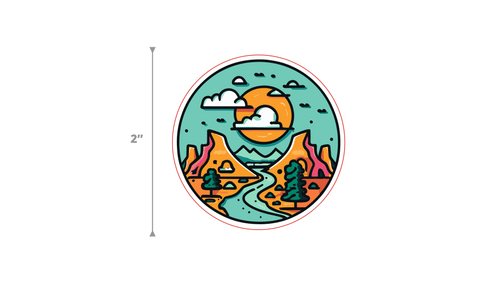
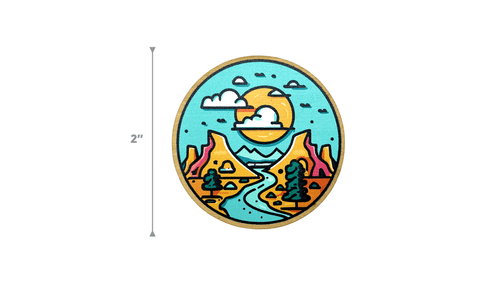
Design to the size of the final product. Do not design at 5x the size and then scale it down. You can lose some detail.
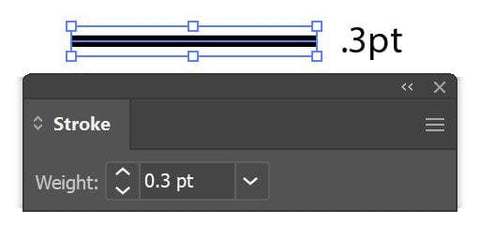
Make sure your artwork lines are no smaller than 0.3pt. We can engrave smaller lines but sometimes you run the risk of losing detail.
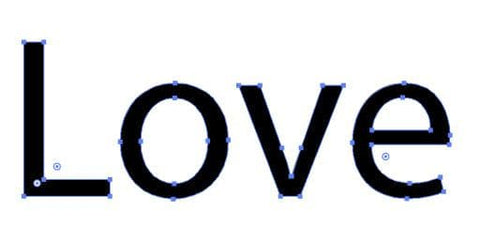
If you include any type, make sure there are no misspellings and please outline the font so that it shows exactly as it should.
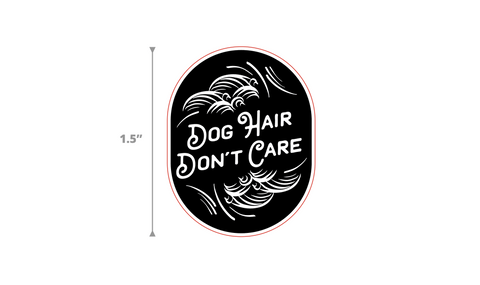
Everything is black (#000000) or white (#ffffff). No greys or gradients. Just black and white. The black will be engraved and the white will stay as raw wood. The only exception of color is the “cut” line, it should be red (255 Red, 0 Blue, 0 Green) and .001pt thick.

Be conscious of large black areas. Especially if you have any type of thin design elements inside the engraved area. This can, in some cases, cause small details to flake away.
In some cases we can assist in converting your jpgs, pngs, and image files to artwork that is engraveable. Please do not submit full color images as we can not use these for engraving. If you have any questions on what can work or not, just send us a message, we will be glad to help.
How does it look?
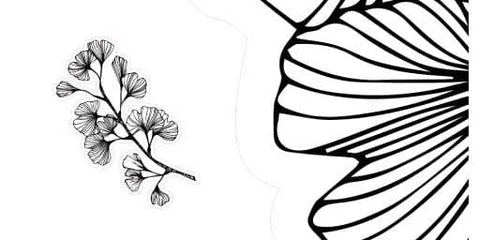
We take your artwork and engrave anything that is black and cut anything that uses a red line. It's that simple! Below you will find a detailed example of how artwork is converted to a wooden engraving.

Tips for setting up your artwork to be UV Printed
Just like with engraving great artwork plays a huge part in how well your wood pins, stickers or keychains print. Follow the tips below before submission. If you have any questions, just ask! :)
The “cut” line around or within your artwork should be red and .001pt thick.
Make sure your artwork lines are no smaller than 0.3pt. We can print smaller lines but sometimes you run the risk of losing detail.
If you include any type, make sure there are no misspellings and please outline the font so that it shows exactly as it should.

High-resolution raster images and vector images are great for printing. If you can, we would suggest uploading vector artwork. Otherwise, we would recommend ensuring that your artwork has a resolution of at least 300 pixels per inch.
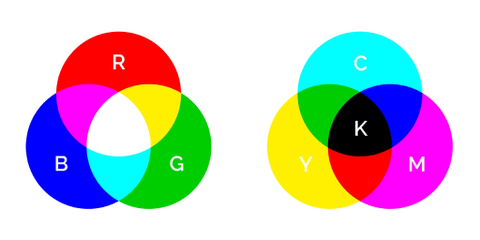
To make sure we achieve the best possible color match for your print, we suggest using CMYK colors. If you provide artwork as RGB we will match as close as possible. Since RGB has a larger range of colors than CMYK, some RGB colors are difficult or impossible to match exactly.
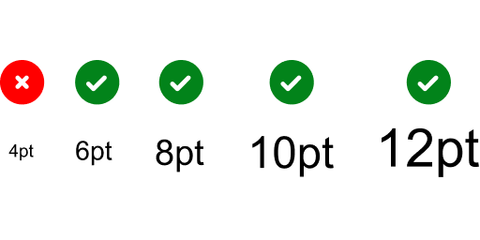
For legibility, please use a 6 pt font size or larger. Different fonts have different weights, colors, and styles and can possibly be made smaller. If your artwork has a font smaller than 6 pts, we recommend ordering a sample first.
How does it look?
We take your artwork and digitally print it using our super awesome UV printer - the ink is printed directly on the wood and immediately cured with a UV light. It's that simple! Below you will find a detailed example showing the original artwork and the final product.